Sunday, July 27, 2014

Fresh Lemon Curd

Love lemons as much I do? Wanna put them on everything you make? Whip up a batch of lemon curd and pour it on all your citrus-lacking food! It's fairly easy to make, as long as you remember patience is  the key.

You will need:
1 cup granulated sugar
Zest from 1 lemon
1/2 cup fresh lemon juice
6 tbsp. butter (softened)
2 whole eggs
2 egg yolks
1  1/2 tsp. vanilla

To start:
1. Put the lemon zest and sugar in a food processor together and finely mince them together. You may need to stop the processor and shuffle the mixture around to avoid clumpy lemon-sugar.
2. Next, thoroughly  cream together the butter, vanilla, egg & yolks, and lemon-sugar.
3. Now, stir the lemon juice into the creamy mixture. It won't want to combine and will look curdled, but this is normal.
4. Pour the mixture into a medium sauce pan and turn your stove to low heat. Constantly stir the pot until the mixture is smooth and consistent.
5. Next, turn up the heat to medium. Continue to stir as it thickens. Once it has thickened to a pudding-like consistency. Pour the curd into a jar or container and allow to cool completely before putting a lid on it or serving it.


After making fresh lemon curd for the first time, I've realized it's very important to make this on a regular basis. I used it with panna cotta and a blueberry Dutch baby pancake (recipes to be posted soon!), but you could use it for practically anything! It would be good in crepes or to serve with scones. Many people like to use lemon curd to top blueberry pies! If you love lemons, you don't really need a reason to make this! Just whip up a batch to keep in your fridge for whenever you get a citrus craving! I hope you found this recipe to be helpful and delicious!

Happy Cooking!

Wednesday, July 23, 2014

Whole Wheat Bread

There's just something so satisfying about making your own bread! This is great bread to have with jam and tea or coffee. It's perfect for serving with breakfast, brunch, lunch or dinner! Wrap it in pretty paper, tie it off with a bow and you've got a nice gift for a friend!

You will need:
2 1/4 teaspoon active dry yeast
3 cups whole wheat flour (plus some for sprinkling)
2 Tbsp. vegetable oil
1 Tbsp. brown sugar
3 Tbsp. non-fat dried milk
2 cups + 2 Tbsp. warm water
OPTIONAL
1 egg
salt

To start:
1. In the bowl of your standing mixer dissolve the brown sugar into the oil and water. Sprinkle the yeast onto the surface of the liquid. Once the yeast is also dissolved, add the dried milk.
2. Using your standing mixer fitted with the bread hooks, mix the flour into the liquid. one cup at a time.
3. Once thoroughly mixed, turn the dough out onto a floured surface. The dough may be sticky, so you'll want to flour your hands as well.
4. Put the dough in an oiled bowl and cover with plastic wrap. Place the bowl in a room-temperature, draft free place. (an unheated oven works well for this.) Let the dough rise for two hours (or until doubled in size.)
5. After the two hours, pre-heat your oven to 375 F. Grease two 8x4" loaf pans or line them with parchment.
6. Punch the dough down to size. Make sure you flour your hands because the dough is apt to be sticky. Separate the dough into two even portions and place them both in the pans. If the dough is not sreading to edges of the pan, use your hands to spread it out. OPTIONAL- Beat an egg and wash the dough with it. Salt the top of your dough and slash it.
7. Bake for 25 minutes or until golden brown.


Yeilds 2 loaves.

Happy cooking!


Peach-Strawberry Jam

This was my first time making jam and it turned out so well! This recipe doesn't call for any gelatin base products: just fruit and sugar!

You will need:
A small saucepan
2 large peaches
5-6 ripe strawberries
2/3 cup brown sugar
Juice from one lemon

To start:
1. Peel, pit, and cut the peaches into small chunks.
2. Cut the tops of the strawberries off. Cut the strawberries into smaller bits as well.
NOTE: The smaller you cut the fruit, the better. This will help you avoid overly chunky jam.
3. Put the cut up fruit and lemon juice in the sauce pan and stir so the juice is evenly distributed.
4. Turn the stove up to high heat and place the pan on the burner.
5. Add 1/3 cup of brown sugar to the pan and stir as it melts. Use your spoon to slightly mash the fruit. I used a potato masher to make the fruit a bit softer.
6. Add the remaining brown sugar and let it melt in the pan. Once it's melted and no longer grainy, let the mixture sit on the heat and simmer. Stir the pan occasionally to keep it from burning.
7. Once the jam has taken on a thick consistency, pour it into a jar and let it cool completely before adding the lid.  Refrigerate for 2-4 hours before serving.


This jam is simple to make and so delicious! It's great for gifts or to keep for yourself.  You can try it on toast, pancakes, crepes, or as cake filling. Not a strawberry or peach fan? This works with blueberries, plums, raspberries, or blackberries as well!  I hope you have fun with this recipe and enjoy the jam!

Happy cooking!

Wednesday, June 25, 2014

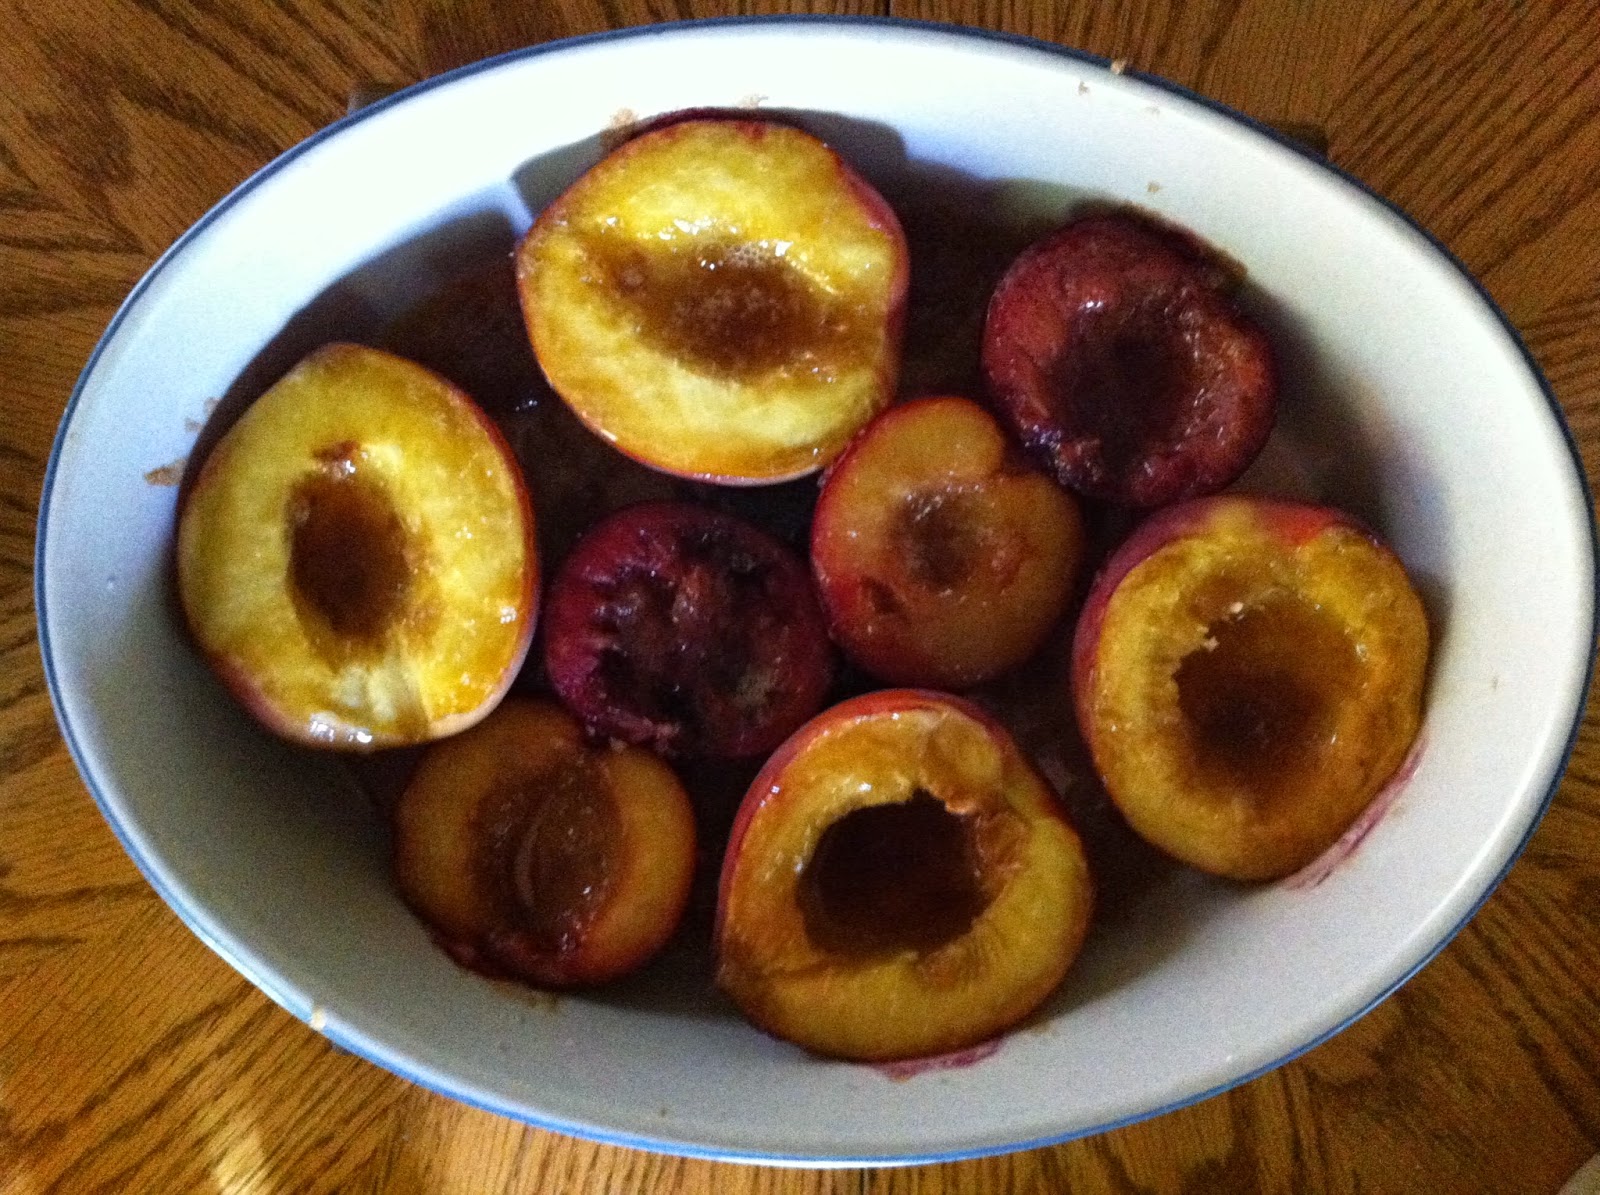
Baked Peaches and Plums

I love peaches, plums, and baking, so this recipe is just about my all time favorite! It's a healthy, yet delicious breakfast option!  The plums and peaches are so warm and gooey and just melt in your mouth.

This recipe calls for butter, but it can be omitted for an even healthier version.

You will need:
2 peaches
2 plums (red or black)
1/2 cup light brown sugar
2-3 tbsp. melted butter
Cinnamon- OPTIONAL

To start:
1. Pre-heat your oven to 350 F.
2. Half your peaches and plums and scrape out the pits. Halving them can be tricky business.  Starting at the top of the fruit, make a cut that goes as deep as the pit and wraps all the way around the fruit.  Twist the two sides in opposite direction of one another. Be careful when doing this with the plums because their skins are more sensitive than the peaches'.
3. Place all the halves in a baking dish big enough to fit all the fruits. Lay them so the cut side is facing up.
4.  Sprinkle the brown sugar over all the fruit, paying special attention to the plums. They tend to be more tart than peaches. OPTIONAL- Sprinkle a little cinnamon over the entire dish.
5. Drizzle the melted butter over and in between the fruits.
6. Bake for 20-25 minutes.


I loved this dish with some heart shaped egg on toast and good company! It's a simple, but tasty recipe that will impress your friends and family; not to mention beautiful! I love making baked peaches and plums and hope you find that you do as well! I hope you found this recipe helpful!

Happy cooking!

Tuesday, June 17, 2014

Follow Yumzamillion on Instagram!

Yumzamillion is on Instagram!  http://instagram.com/yumzamillion
Follow for updates, cooking tips, and pictures not posted to the blog!!


Chocolate Chip Cream Cheese Cookies

I've discovered the secret to chocolate chip cookies that never get hard... cream cheese! These little cookies are so perfect and delicious!! You'll amaze any and every one who tries these cookies. They literally do melt in your mouth.

You will need:
8 oz. cream cheese, softened
3/4 cup brown sugar
1/2 cup granulated sugar
1/2 cup (1 stick) butter
1 tbsp. imitation vanilla
1/4 tsp. baking powder
1 tbsp. cornstarch
2/3 cup all purpose flour
1 cup semi-sweet chocolate chips
1 large egg

To start:
1.  Let the butter and cream cheese set out for about 30 minutes to get soft.  If the cream cheese is not soft enough, it will ruin the consistency of the cookies.
2. In a large bowl cream together the butter, cream cheese, sugars, egg, and vanilla.
3. In a separate bowl mix together all the dry ingredients, including the chocolate chips.
4.  Fold the dry mixture into the wet mixture 1/3 at a time.
5.  Heat oven to 325 F.  Line a 9x13 cookie sheet with parchment paper and drop cookies onto it.  This batter is runny, so don't try to to roll into balls unless you want sticky hands! Drop them 1 1/2 inch apart because they will spread.
6.  Bake for 20-23 minutes or until cookies don't jiggle when the pan is shaken.
7.  Allow the cookies to cool down completely before removing them from the sheet, otherwise the bottoms will fall out.


Yields: 3 dozen small cookies

I absolutely adore these cookies. Bake with caution: they are extremely rich and highly addictive.

Happy Baking!!

Tuesday, May 6, 2014

Lemon Cream Cheese Cookies

My family was needing a little comfort food tonight, and these cookies were the perfect fix.  They're tangy and sweet and so addictive.  They're soft, chewy, and melt in your mouth!! I frosted mine with Martha Stewart's Swiss Meringue Buttercream (my newest obsession!)  This icing complements these sweet little cookies perfectly and I strongly suggest using it with this recipe!

Yields 36-48 cookies

You will need:
1 8oz. package of cream cheese
1 cup granulated sugar
1/4 cup lemon juice
1 large egg
3/4 cup almond meal (sifted)
5/6 cup (1/2 plus 1/3 cup) all purpose flour
1/2 tsp. baking soda
1/4 cup confectioners sugar

To begin:
1. Your cream cheese needs to set out for 25 to 30 minutes before being used.  If it's not soft enough, it will cause the batter to be clumpy. Pre-heat oven to 325 F and line two 9x13 cookie sheets with parchment.
2.  Once the cream cheese is soft enough, cream it together with the sugar, lemon juice, and egg.  Mix well until there are no clumps.
3.  In another bowl, combine the sifted almond meal, flour, baking soda, and confectioners sugar. Add a quarter of the dry mixture to the wet mixture at a time.
4.  Drop dough balls 1 1/2 inch away from each other. The dough should be a little runny, so once it hits the cookie sheet, it will spread itself out.  Bake for 20-23 minutes or until slightly golden on the edges.
5.  Let the cookies cool before removing them from the parchment. If you try to take them off too soon, the bottoms will fall out of them.
6.  Once the cookies are completely cool, ice them with the Swiss Meringue Buttercream.  This icing is extremely sensitive to heat, so make sure you've allowed your cookies enough time to sit.


I love these cookies! They're fun to personalize and decorate, not to mention soooo tasty! I hope you found this recipe helpful and simple!! Happy baking!